Facebook Account and Profile 2
How to Delete Your Facebook Account
Facebook offers two options for those who want to get rid of their account. The first one is to deactivate it, and the second one is to permanently delete it. Next we will clarify the difference between these two procedures and we will see how to perform each one of them.
Deactivating your account
When you deactivate your account, your profile and all its associated information are immediately made inaccessible to other Facebook users. Although this means that you effectively disappear from the service, your information will remain saved by Facebook so that you can reactivate your account whenever you want.
By using this procedure, many users deactivate their account for temporary reasons, and when they return to the service, they recover their “list of friends” and their photos, just as they were before they left.
To deactivate your account you must open the Account menu on the top right of the page, and then select the option “Account Settings,” where shown by the red arrows in the next image: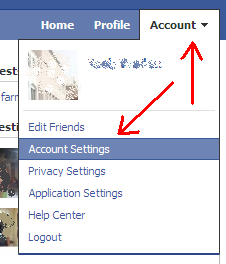
Then you will see a screen in which you must click on the link that says “deactivate,” where shown by the red arrow in the next image: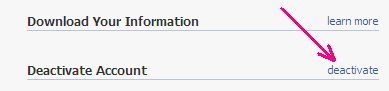
Once you have done this, Facebook will ask you if you are sure of what you are doing, and it will try to convince you of not deactivating your account by showing you pictures of some of your friends, with messages telling you that they will miss you. To complete the process, you just have to select an option in the section called “Why are you deactivating,” and then click on the button that says “Deactivate My Account.”
Permanently deleting your account
Facebook also offers an option for those who want their account deleted with no chance of recovery. This option is only accessible in this link, which is provided in the Facebook Help Center when you type “delete my account” in its search box.
Once you have opened the page of that link, you must click on the Submit button and then, on the next screen, you must enter your account password. Facebook will ask you to confirm the action, so you will have to click on the Okay button.
To finish this process you must avoid logging in to your account during the next 14 days. After that period of time, your information will be no longer available, never again